
Learn how to fix QuickBooks Error H202. Like a pro, we’ve got you covered with simple solutions to help you get back on track quickly.
QuickBooks enterprise accounting software helps its users manage their business finances effectively. However, due to the technical complexities of the software, it is prone to a wide range of technical errors. The recurrence of unwanted errors with the software disrupts the smooth functioning of the accounting software and disallows the users to work efficiently. One such common error is QuickBooks error H202.
This error is often seen when the user tries to switch to multi-user mode but fails to do so. Although tackling this error might seem like a difficult task, it can be resolved easily by implementing a few simple steps. This article will cover in-depth information about how to fix QuickBooks Enterprise error H202. Thus, make sure to go through this blog till the end to resolve this problem.
However, the easiest way to resolve the error is to get in touch with our QuickBooks support team through a dedicated helpline number. Our experts are available 24/7 and will cordially attend to your query with utmost priority.
Quick Explanation of QuickBooks Error H202
Before we directly jump to the troubleshooting methods and other related information, it’s better to deeply understand what the error is all about. This will help you easily grasp the underlying reason behind the error and find the best troubleshooting solution.
QuickBooks error H202 is a multi-user error that occurs when the user tries to switch to the multi-user mode or tries to access a company file stored in a different system. This error is a part of the H series error and mainly appears with the Enterprise version of the software. In most cases, the QuickBooks error h202 multi-user appears with a pop-up display message as follows:
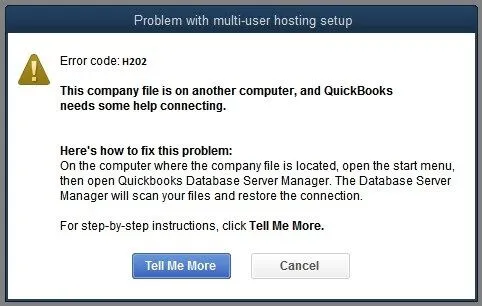
The workstation uses the network to connect to the company file, and when there is an issue with the network connection, it can lead to QuickBooks Enterprise error H202. However, this error can arise due to a lot of reasons and factors. You can check out the reasons listed in the below section.
Factors Contributing to QuickBooks Error Code H202
Well, there can be a majority of reasons why you may encounter the error code h202 QuickBooks. Some common factors contributing to the error are listed below:
- A corrupted or damaged Network Data (.ND) file is the primary reason behind the error.
- When QuickBooks fails to track the IP address of the host system.
- Inappropriate DNS settings.
- QuickBooks internal services like QuickBooksDBXX/QBCF are inactive.
- Active firewall settings on your PC is blocking the connection request between the QuickBooks and online server.
- Incorrect hosting settings can also lead to the QuickBooks multi-user error H202.
- If the DLL files are missing from your workstation.
These are some of the factors contributing to why you may face the H202 error QuickBooks. Before jumping to the troubleshooting steps, we advise you to identify the specific underlying reason why you may be facing the error. This will help you to resolve the error more effectively and efficiently.
How to Fix QuickBooks Error H202 (Multi-User Issue)?
Fixing the QuickBooks error H202 is a simple and straightforward process. It requires the users to carry out certain troubleshooting steps. However, if you have identified the exact underlying reason behind the error, you can directly perform the necessary steps to resolve the error. But still, if you are not aware of the reason, then we recommend you execute the troubleshooting solutions listed below.
Method 1. Verify QuickBooks Services
If the server is running a full version of the QuickBooks software, it is important to ensure that the QuickBooks services are running properly. If any of these services are inactive, it can lead to errors and issues with the software. Here are the actions that you can undertake to verify the QuickBooks services on your workstation:
- Launch the QuickBooks desktop application on your server workstation.
- After that, navigate to the File menu option and choose the Utilities option.
- As the utilities section expands on the screen, select the Host Multi-User Access option.
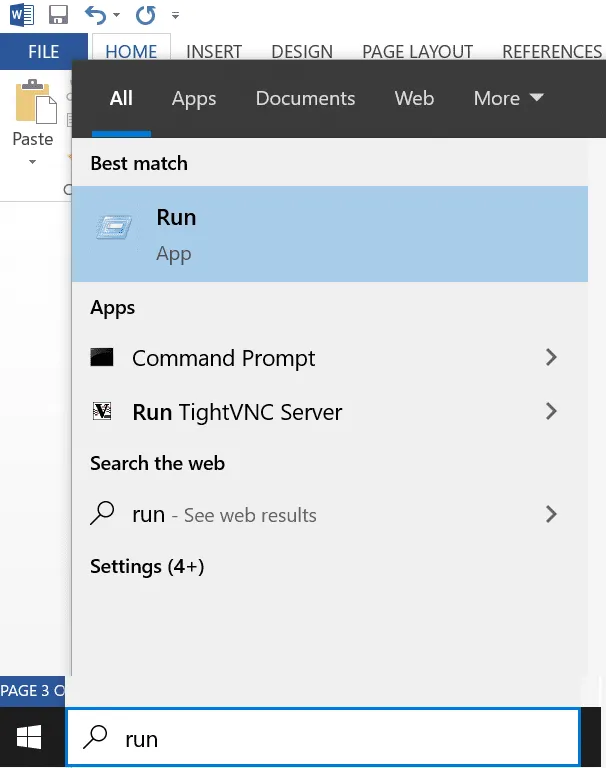
- To verify the running status of the QuickBooksDBXX and QBCFMonitorService, launch the Run Command on your PC.
- After that, type Services.msc in the search bar and click on the OK option.
- Thereon, a list of available services will open on your PC.
- Here, you have to search and select the QuickBooksDBXX service. Also, ensure that the startup type is chosen as the Automatic option. If not, then change it immediately.
- Moving ahead, make sure that the Service Status is appearing in Running mode.
- Go to the drop-down menus for first, second, and subsequent failures and select the Restart the Service option.
- Click on the Apply option and confirm the changes by clicking on the OK option.
- Once you are done with the above steps, then perform the same steps again for QBCFMonitorService.
Method 2. Run the QuickBooks File Doctor Tool
QuickBooks File Doctor is a useful and in-built tool in the QuickBooks Tool Hub that helps to resolve various H series errors with the software, such as H202, H303, H505, etc. QB File Doctor automatically scans and detects the issues with the company file and repairs them on its own. Here are the steps that you can follow to run the QuickBooks File Doctor tool on your workstation:
- First, download and install the latest version of the QuickBooks Tool Hub (1.5.0.0) on your workstation.
- Thereon, launch the Tool Hub and then choose the Company File Issues section.
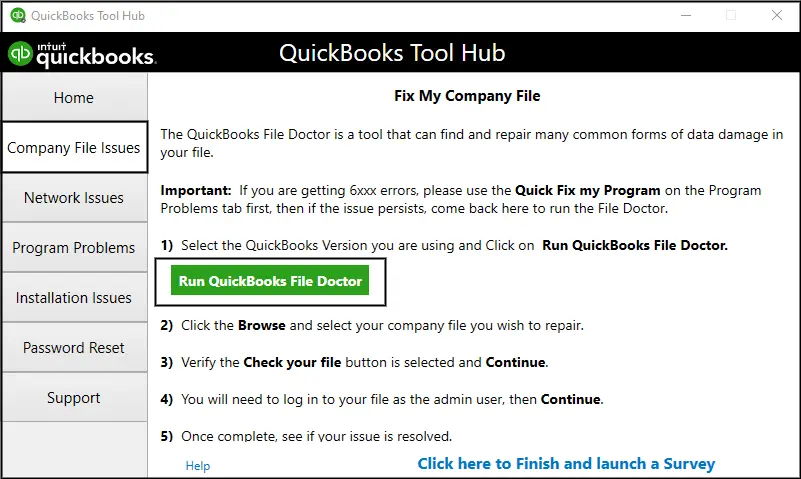
- After that, click on the Run QuickBooks File Doctor option.
- Choose your company file from the drop-down menu. In case you can’t find your company file in the list, click on the Browse option and then manually navigate to the location where you have saved the company file.
- Choose the Company File and then click on the Continue option.
- At last, provide the QuickBooks admin login password and click on the Next option.
With that effect, the QB file doctor will start the scanning process of your company file. It might take a few minutes, depending on your company file size. As the process ends, relaunch the QuickBooks software and try to access the company file again in multi-user mode. If you are still facing the QuickBooks multi-user error code H202, then try the next method.
Method 3. Run QuickBooks Database Server Manager
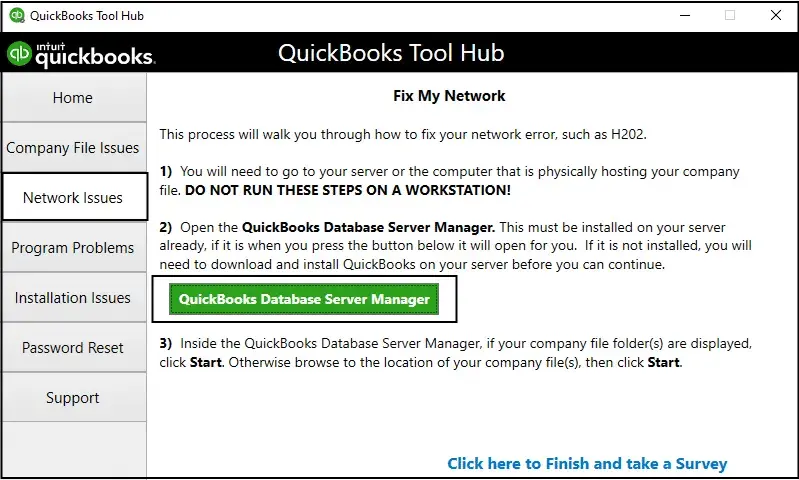
The QuickBooks Database Server Manager will help you manage your company files in a multi-user environment. This will allow you to setup and configure the server for optimal performance. Here are the steps that you can follow to run the QuickBooks Database Server Manager on your workstation:
- Run the QuickBooks Tool Hub on your PC and choose the Network Issues option.
- Thereon, choose the QuickBooks Database Server Manager option, and then, within the server manager, you will be asked to choose the relevant folder in which your company files are stored.
- Here, you can also click on the Browse option to select your company files.
- After that, tap on the Start Scan option, and then the database server manager will automatically repair the firewall permissions on your workstation.
- At last, click on the Close option.
Launch the QuickBooks program after completing the aforementioned steps, and then try to switch to the multi-user mode. Verify whether this method has helped you to resolve the QuickBooks error H202 or not.
Method 4. Move QuickBooks Company File (.QBW) to a New Folder
This method is extremely useful in cases where the QuickBooks error H202 switching to multi-user mode appears even after performing the above-listed methods. This method will ensure that the QuickBooks company file is allowed the necessary permissions and is not blocked due to firewall settings.
- First of all, create a new folder on your server workstation.
- Thereon, provide adequate rights and permissions to the newly created folder and then move the QBW file to the folder.
- Now, try to access the company file from the newly created folder.
- If you can easily access the company file from the new location, it indicates that the original company file folder is damaged.
- Whereas, if you are still unable to open the company file, it indicates that the issue is underlying the company file itself.
Method 5. Verify the Network Connection
In order to verify the network connection, you have to test the network connectivity settings on your workstation. Below are the actions that you can follow to do the same on your workstation:
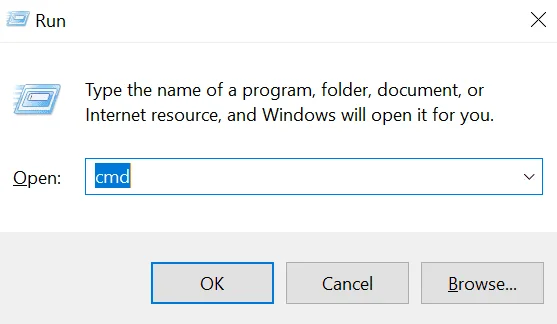
- First of all, open the Windows Run Command and type CMD in the search bar.
- Click on the OK option.
- Thereon, you have to ping your server from the computer.
- For that, type ping_servername and press the Enter key on your keyboard.
Perform the above steps for all the systems on which you are encountering the error.
Method 6. Run QuickBooks Install Diagnostic Tool
Another substantial method you can follow to deal with the QuickBooks multi-user error H202 is to run the QuickBooks install diagnostic tool on your workstation. Following are the steps that you undergo to do the same:
- Run the QuickBooks Tool Hub on your PC, and from there, choose the Installation Issues option.

- After that, click on the QuickBooks Install Diagnostic Tool option.
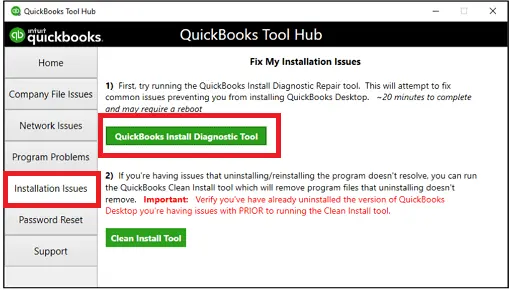
- Thereon, the tool will automatically run the repair tool. This will fix all the errors and issues related to the QuickBooks installation.
- During that, make sure to note down the IP address and network interfaces.
- If you notice that the firewall status has an Open Ports tab, then make sure to enable the ports for QuickBooks.
- Try to access the company file again and check whether the error has been resolved or not.
Method 7. Rename Network Data and Transaction Log File
If the QuickBooks Network Data (.ND) or Transaction Log (.TLG) files are damaged or corrupted, it can cause various errors with the software, including error H202 QuickBooks desktop. Therefore, by renaming these files, you can ensure that the software creates new files that are neither damaged nor corrupted.
Let’s take a look at the steps that you can follow to rename the ND and TLG files on your workstation:
- Close the QuickBooks desktop application on your server workstation and open the company file folder.
- Thereon, search there for the network data file. Here, you can identify the file by looking at the extension ending with .nd.
- Select that file and add .old at the end of the name.
- So, with that effect, the new extension of the network data file will end as .nd.old.
- Perform the same steps again for the transaction log file and rename it to .tlg.old.
- Once you have renamed both of these files, launch the QuickBooks software and access the company file.
- This will automatically create new files that will be free from damaged or suspected errors.
Method 8. Add Server to the Windows Host File
By adding the server to the Windows host file, you can ensure that your computer can locate and establish a connection with the server without any issues. This will help in troubleshooting connectivity errors that you might experience while working on the software, including QuickBooks error h202 multi-user.
- Close all the active applications and programs on your server PC.
- Thereon, navigate to C:\ Windows\ System32\ Drivers\ Etc or C:\ Windows\ Syswow64\ Drivers\ Etc.
- When the prompt window appears, double-click the host’s file and choose Notepad.
- Now, manually provide the IP address and the computer’s name.
- Subsequently, provide the IP address and the computer’s name for the server. You can use the Tab key to separate the computer name and the IP address.
- Following the above steps, try to access the QuickBooks company file in multi-user mode to verify whether the error has been terminated.
Ending Note
So that’s the end of this blog on how to fix QuickBooks error H202. We hope that the information presented in this blog has helped you understand the error in a better way. By performing the methods listed above, you can easily resolve the error H202 QuickBooks Enterprise. However, if you continue to experience the error, we recommend that you get in touch with the QuickBooks enterprise support team. By getting in touch with the experts, you can get personalized assistance and guidance to resolve your queries.
Selina Conner is a technical professional who works with important technological areas focused on data recovery and associated technologies. She enjoys writing about diverse technology and data recovery topics on a daily basis.