

Learn the complete procedure for how to fix QuickBooks error 6209 0 and prevent it from occurring again.
In the fast-paced world of business, managing finances is like juggling a dozen eggs – one wrong move, and you could end up with a mess on your hands. But don’t worry; with QuickBooks desktop accounting software, managing your finances is made easier and error-free. The perfect business partner provides users with a seamless experience in tracking expenses, generating reports, and ensuring accurate financial data.
Despite the software’s benefits and features, we can’t overlook its vast array of technical errors and glitches. One such common error that we cannot ignore is QuickBooks error 6209 0. If you are also experiencing this error and are looking for a reliable and effective walkthrough, then you have landed at the right spot. Written by our U.S. based certified professionals, this blog will guide you with step-by-step instructions on how to troubleshoot and resolve the QuickBooks error code 6209 0 effectively. Therefore, by following our expert guidance, you can quickly get back to your accounting software and start using it smoothly without interruptions.
What is QuickBooks Error 6209 0?
QuickBooks error 6209 0 is most likely to occur when the user tries to install the QuickBooks application or while updating the software or Windows to the latest release. This error indicates that there is an issue with the installation process or that the file is corrupted. As a consequence of this error, you may experience difficulties accessing your QuickBooks company file or some of the certain features of the software.
The QuickBooks 6209 0 error is accompanied by a pop-up display message similar to the image mentioned below.
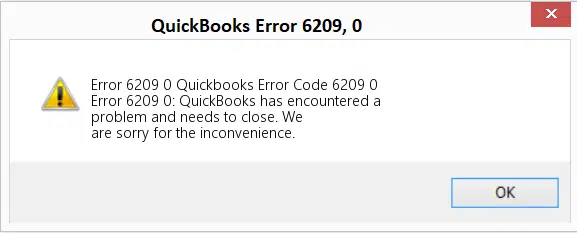
In other words, QuickBooks error code 6209 0 disrupts the software’s functionality and may require troubleshooting steps to fix. Therefore, it becomes important to address this error promptly to ensure the software’s smooth operation and avoid any potential data loss.
What are the Causes of QuickBooks Error 6209 0?
Understanding the underlying reasons behind QB error code -6209 0 is important in order to effectively resolve it. This will help you identify the root cause and may assist you in implementing the appropriate solution. Although there can be multiple reasons for the error, below we have filtered out some of the most common and appropriate reasons why users often encounter QuickBooks error 6209.
- The primary reason behind the error is the damaged or corrupted QuickBooks installation files.
- The damaged Microsoft .NET framework is another possible reason behind the error.
- If the QuickBooks Network Data (.ND) or Transaction Log File (.TLG) file is damaged, then it can also lead to the occurrence of -6209, 0 QuickBooks error.
- QuickBooks-related files or internal components are missing from the workstation.
- If you have not updated the QuickBooks desktop software for a long time, this can contribute to the occurrence of QB error 6209.
- Active firewall settings can also disallow the QuickBooks software from operating smoothly.
Solutions to Fix QuickBooks Error Code -6209 0
After a detailed understanding of the possible causes behind the error, it’s time to explore the troubleshooting steps to fix it. In this segment, we will walk you through some of the solutions that you can easily execute step-by-step to fix QuickBooks error -6209. Therefore, avoid skipping any of the steps and ensure that you follow the instructions carefully.
Solution 1. Repair the QuickBooks Desktop Application
The first solution we recommend you follow to deal with QuickBooks error code 6029 is to repair the QuickBooks desktop application. This step will ensure that no corrupted or damaged files in the application are causing the error. Below are the actions you can take to repair the QuickBooks desktop application.
- The first step is to navigate to the Control Panel settings on your PC.
- Then, choose the Programs and Features option, followed by a click on the Uninstall a Program option.
- From the list of available programs, search there for QuickBooks software and then click on the Continue option.
- Following that, click on the Repair and Next option.

- At last, as the repair process ends, click on the Finish option.
Solution 2. Update QuickBooks Desktop to the Latest Release
By updating the QuickBooks desktop software to the latest release, you can ensure that you have access to advanced features, bug fixes, and security updates. This will help you improve the overall experience with the software and keep unwanted errors at bay. To update the QuickBooks desktop software to the latest release, below are the actions that you can undertake;
- Launch the QuickBooks desktop software on your server workstation with admin rights.
- Now, press the F2 key on your keyboard, and then the Product Information Window will appear on your screen.
- Thereon, check for the current version of the QuickBooks desktop.
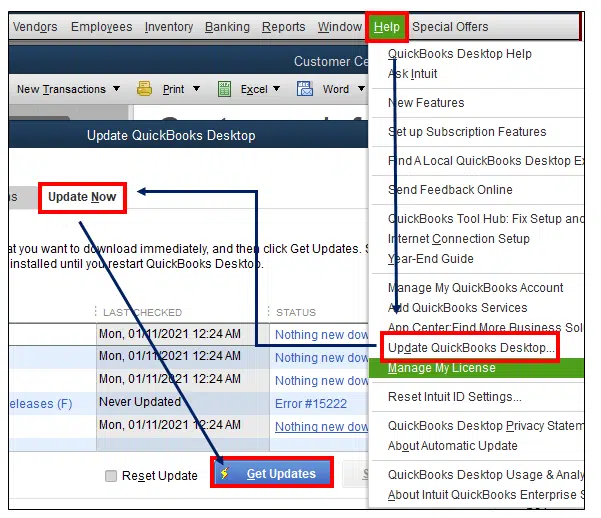
- If you notice that the QuickBooks version is not updated to the latest release, then navigate to the Help menu option.
- Subsequently, click on the Update QuickBooks Desktop option, followed by a click on the Update Now option.
- Following the above steps, click on the Get Updates option.
- Thereon, the downloading process of the latest available updates will commence.
- As that process ends, close the QuickBooks software and launch it again.
- Now, you will see a prompt message on your screen requesting you to install the updates.
- To complete the installation process, click on the Yes option and then follow the on-screen instructions.
Solution 3. Run QuickBooks File Doctor
QuickBooks File Doctor is a useful tool provided by Intuit that helps QuickBooks users fix various errors related to the company file. Let’s take a look at the steps that you can follow to run the QuickBooks file doctor tool on your workstation:
- First, download and install the latest version of the QuickBooks Tool Hub on your PC. You can easily download the QuickBooksToolHub.exe file from the official website of Intuit Products.
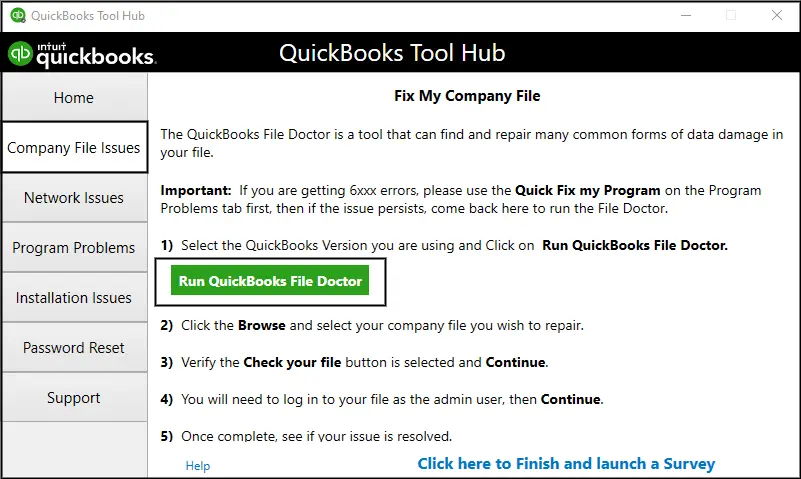
- Run the tool hub and choose the Company File Issues section from the left-side menu.
- After that, click on the Run QuickBooks File Doctor option.
- As the QB file doctor interface expands on the screen, choose your company file.
- If you can’t find your company file from the list, then click on the Browse option and then manually select your company file.
- Moving ahead, click on the Check Your File and then Continue option.
- Following the above steps, provide the QuickBooks admin login password, and again click on the Continue option.
- With that effect, the repair process will commence. As that process ends, click on the Open QuickBooks option and verify for the presence of QuickBooks error code 6209 0.
Solution 4. Rename the QuickBooks ND & TLG Files
The QuickBooks Network Data and Transaction Log files play a vital role in ensuring the software’s smooth functioning. If these files are accidentally damaged or corrupted, they can lead to various errors, including QuickBooks error code -6209 0. Therefore, by renaming these files, you can force the QuickBooks software to create new ones and help resolve the issue.
- Open File Explorer on your PC and then navigate to the location where you have saved your QuickBooks company file.
- After that, search for the network data file. You can easily identify the file by looking for the extension ending with .ND.
- Thereon, do a right-click on the file and choose the Rename option.
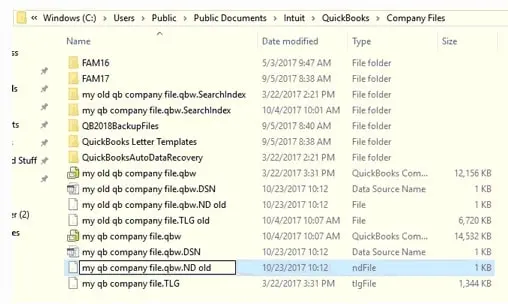
- Add .old at the end of the name, and with that effect, the extension of the file will end as .nd.old.
- In a similar way, rename the transaction log file from .tlg to .tlg.old.
- Once you are done with that, close the file explorer and run the QuickBooks desktop software on your workstation.
Solution 5. Disable the QBCF Monitor Service
If the QBCF Monitor service is active, then it can cause conflicts with the installation process. Below are the actions that you can undertake to disable the QBCF monitor service on your workstation:
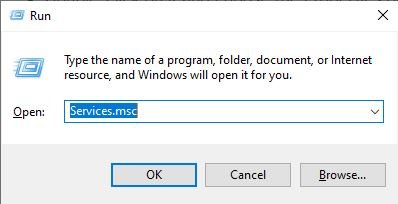
- First of all, press the Windows + R keys together on your keyboard. This will open the Windows run command on your PC.
- Type Services.msc in the search bar and click on the OK option.
- Now, scroll down in the list of services and search for the QBCFMonitorService.
- Double-click on it and choose the Properties option.
- Under the properties window, scroll to the startup type and select the disabled option.
- At last, click on the Apply > OK option.
Ending Note
Fixing the QuickBooks error 6209 0 is not a challenging task. Above, we have shown you five different tried-and-tested solutions you can follow step-by-step to resolve the error. However, if the above-listed solutions do not help you fix the error, then we recommend you get in touch with the QuickBooks technical support team. Experts are available 24/7 around the clock to attend to your calls and help you use the QuickBooks accounting software smoothly and efficiently.
Selina Conner is a technical professional who works with important technological areas focused on data recovery and associated technologies. She enjoys writing about diverse technology and data recovery topics on a daily basis.